Getting Started.
Set up your CRM step by step — from signup to a working workspace.
Create your account
Sign up at /signup. Authentication is handled by Clerk, so you can create an account with email + password or continue with Google.
Right after signup you'll see a brief Setting up your workspace screen while ListingStack provisions your organization, creates an empty agent profile, and generates a URL slug from your name. It redirects to the dashboard automatically after a few seconds — no action needed.
If you signed up through a paid checkout link, you land on a "Confirming your subscription" screen instead, which polls until your subscription is active and then shows a "You're in" welcome screen with a button to the dashboard.
Set up your agent profile & public site
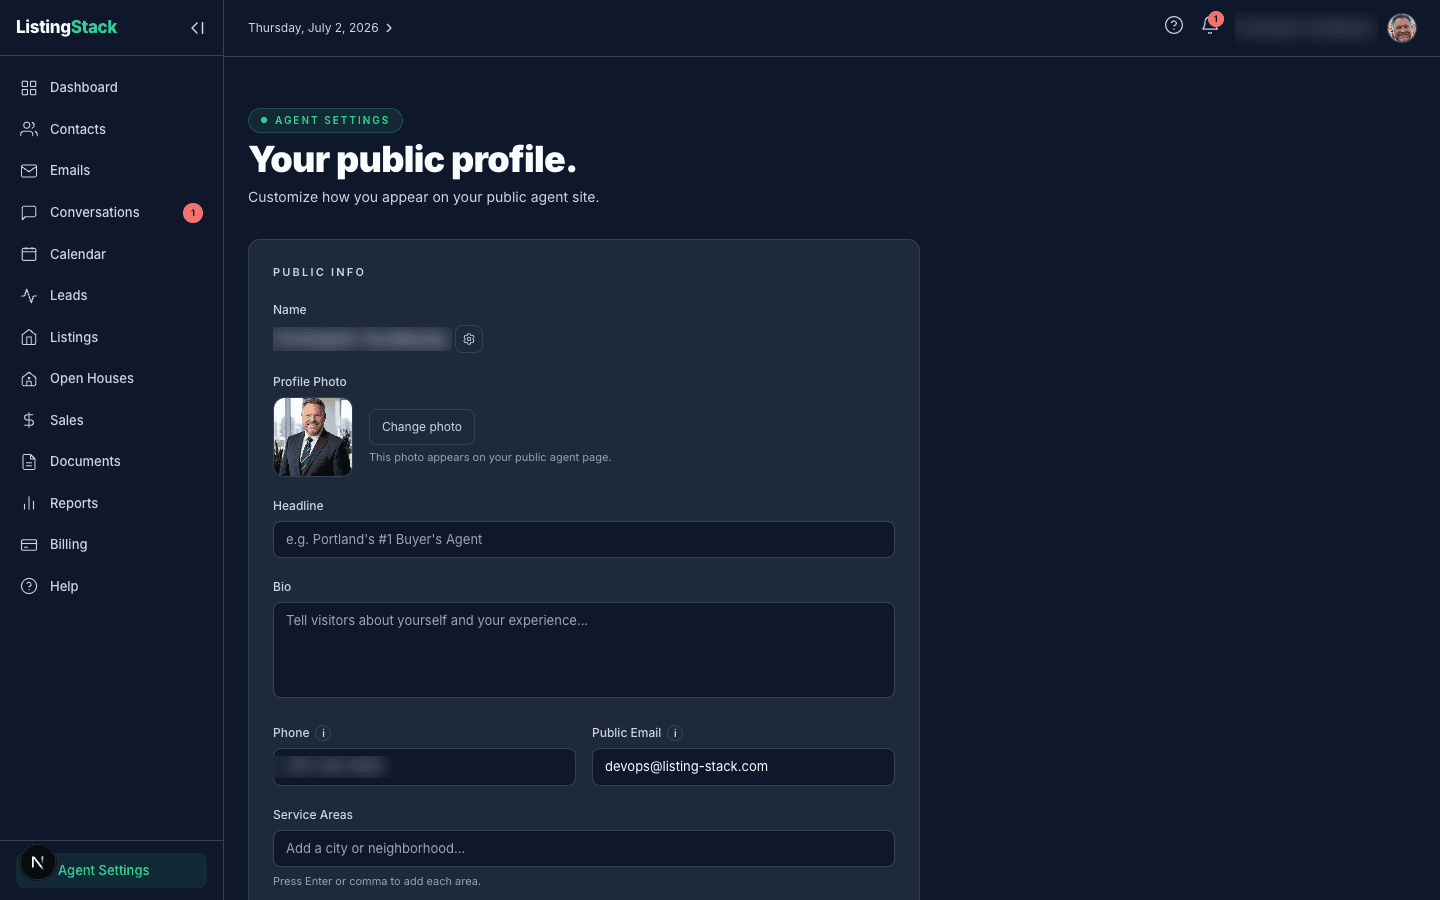
Go to Profile and fill in the pieces that power the rest of the app:
- Photo — a professional headshot, shown on your public site and in outbound email.
- Name — pulled from your Clerk account; click the gear next to it to change it (a login setting, not a profile field).
- Headline and bio — short and long descriptions, shown on your public site.
- Phone and public email — contact details shown on your public site, separate from your login email.
- Service areas — the cities or neighborhoods you work, shown as chips on your public site.
Your public site lives at /a/<slug>. The slug is generated from your name at signup and isn't editable from the app today. Flip Publish public site on and save to make the page live. See the Public Agent Site guide for what appears there.
Bring in your contacts
There are four ways to get people into ListingStack:
- Add manually — from Contacts, use Add contact → Add manually.
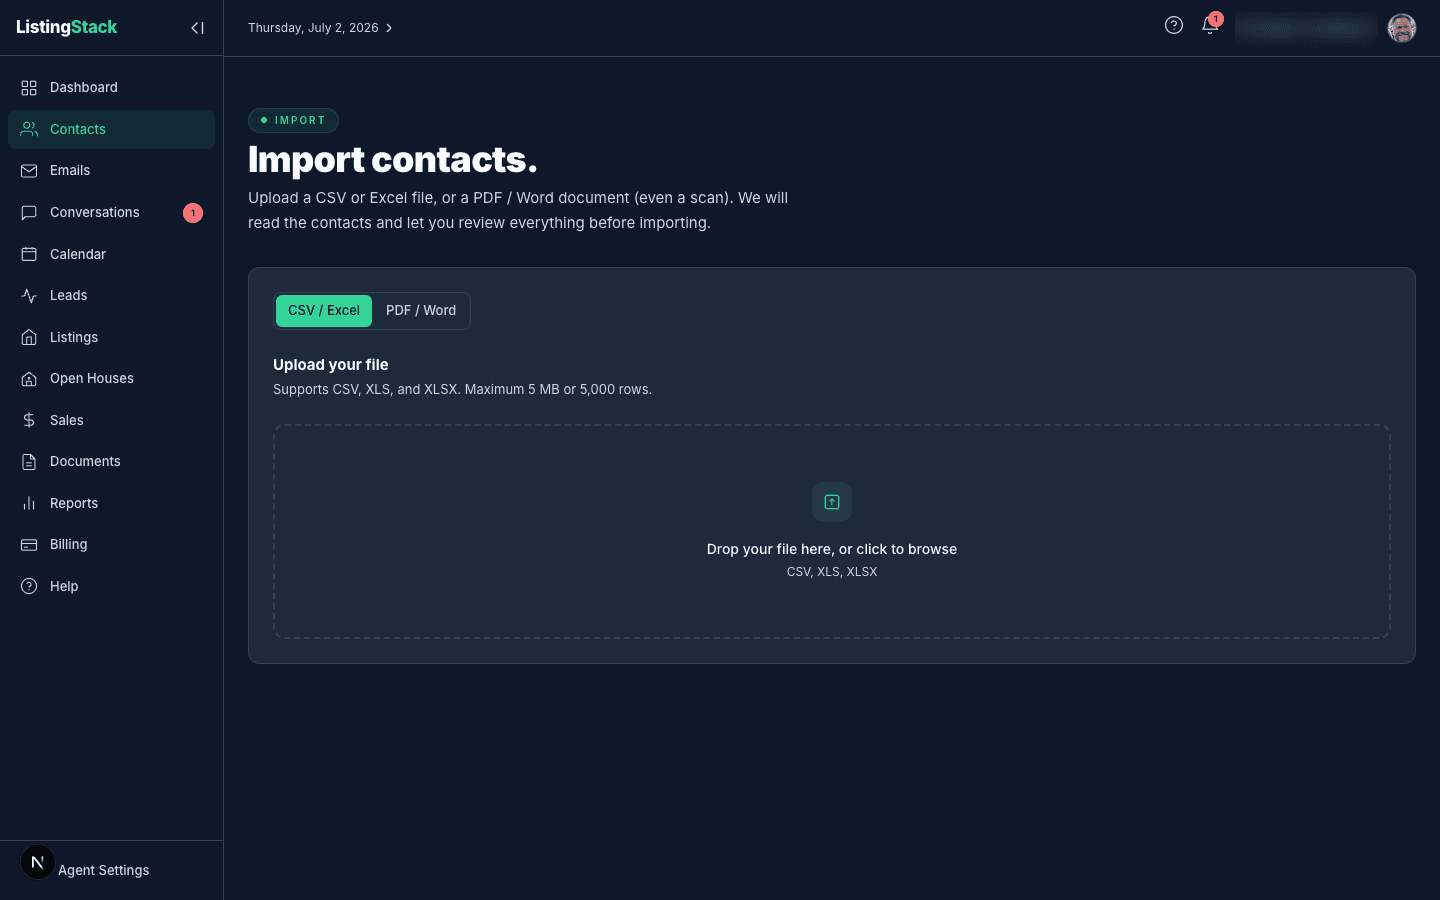
- CSV / Excel import — at Import, upload a spreadsheet; the importer previews what it found before writing anything.
- PDF / Word document import — on the same import page, switch to document mode and upload a file, even a scan; ListingStack reads the contacts out for you to review.
- Business-card scan — use Add contact → Scan business card to photograph a card; the fields pre-fill a new contact form to check before saving.
See the Contacts guide for field details like contact type and tags.
Configure your email
At Email settings, set up how your outbound email behaves:
- From Name and Reply-to Email — the display name and reply address on your drip emails.
- Frequency, Send Day, Send Time — the schedule for your recurring drip campaign.
- Auto-generate emails — if you haven't written one by the scheduled date, the AI writes one for you.
- Auto-enroll all new leads — off by default (only new
past_clientandspherecontacts get an opt-in invite); turn on to enroll every new contact with an email. - Signature block — on by default for personal emails; add custom text below it (license number, brokerage, phone), or turn it off for unbranded sends.
See Email Marketing for how drip and personal sends differ.
Turn on the AI Lead Concierge
At Concierge settings, two toggles control the AI:
- AI concierge enabled — when on, the concierge automatically replies to new leads by email and sends nurture nudges. Turn off to pause all AI activity; conversations are still recorded either way.
- Review all replies before sending — off by default, so the AI sends safe replies on its own. Turn on and every AI-drafted reply is saved for your approval instead of sending automatically.
The concierge replies by email only — there's no SMS. See the AI Lead Concierge guide for how it decides what to say.
Connect your calendar
On Calendar, you can connect Google Calendar so your ListingStack appointments sync both ways. Where Google sign-in is available, click Connect Googleand authorize access; once connected you'll see your Google account and a synced status inline, with a Disconnectlink if you want to turn it off. In workspaces where Google sync isn't enabled yet, you'll see a "Google sync coming soon" note instead — the calendar itself still works without it. See the Calendar guide for more.
Set up lead capture
There are three inlets that turn strangers into leads in your pipeline:
- Your public site's contact form — live once you publish your site (see above). Every submission creates a lead, attached to an existing contact by email match or a brand-new one.
- Open-house QR sign-in — creating an open house gives you a sign-in QR code and a digital sheet; visitors who sign in become leads. See the Open Houses guide.
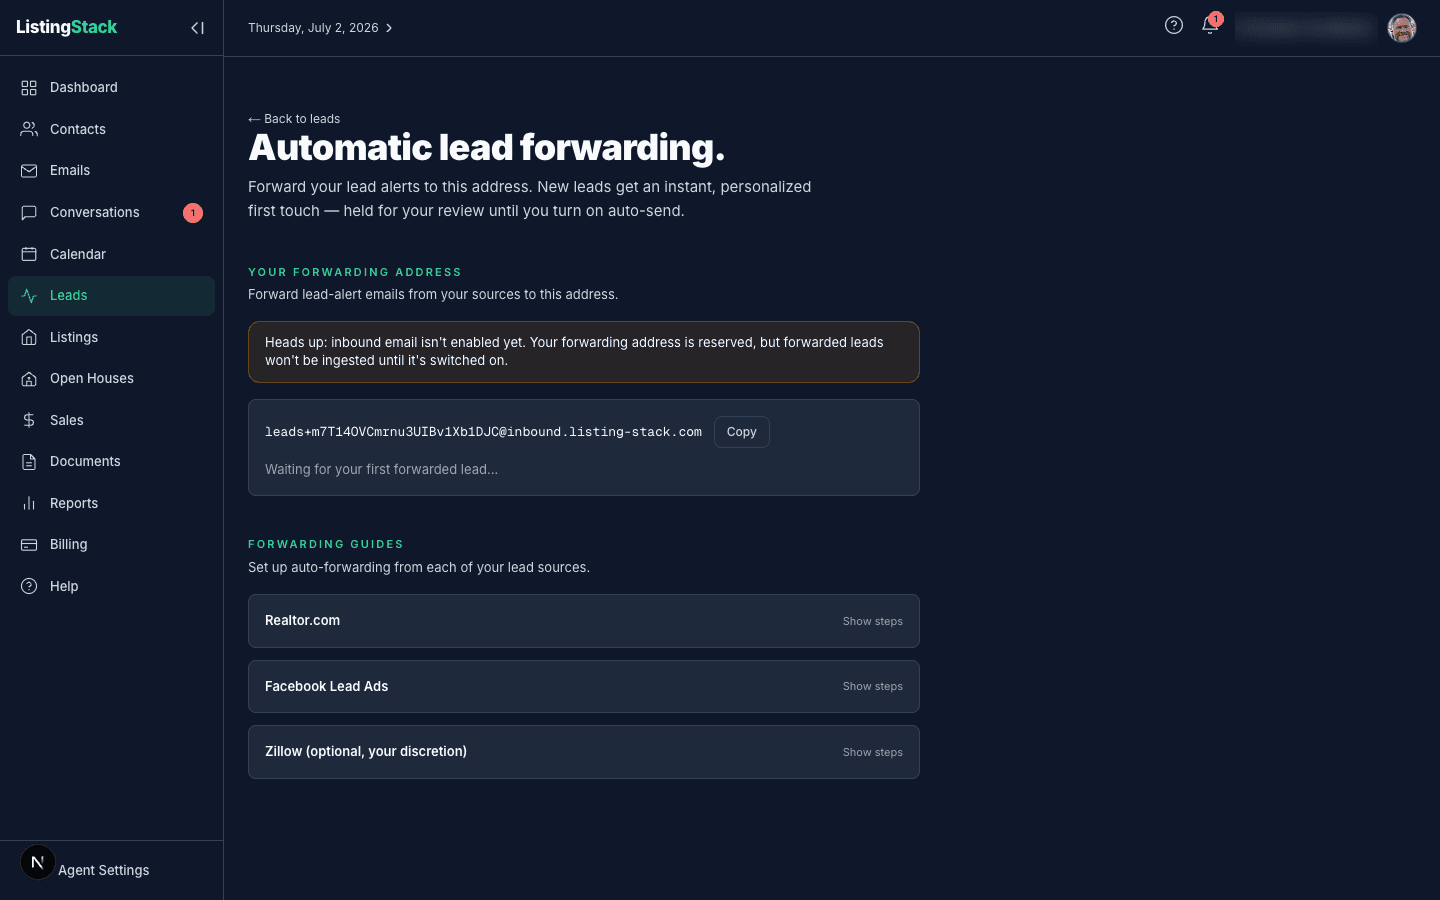
- Lead forwarding — at Leads → Forwarding, you get a dedicated email address to forward lead alerts to from Realtor.com, Facebook Lead Ads, Zillow, and similar sources, with setup guides for each. Your forwarding address is reserved as soon as your account exists, but forwarded-lead ingestion switches on once inbound email is enabled for your workspace — until then, forwarded emails won't be parsed into leads.
Add your first listing
Go to Listings → Add a listing and fill in the basics: address, city, state, ZIP, property type, listing type, price, and the usual specs (beds, baths, square feet). Add photos, a description, and any features.
Save as Draft keeps the listing private while you finish it up. Save & Publish makes it active and visible on your public site immediately. See the Listings guide for the rest.
Search anything (⌘K)
Press Cmd/Ctrl+K anywhere in the app, or click the Search… button in the header, to open a command palette that searches contacts (including their notes), leads, listings, sales, templates, and open houses all at once. Results are grouped by type; use the arrow keys to move between them and Enter to jump straight to the one you want.
The setup checklist
A "Getting set up (N of 7)" card on the Dashboardtracks seven onboarding steps — profile, published site, contacts, lead capture, concierge, calendar, and your first listing — and checks each one off automatically as it detects it in your real data, no manual marking required. It's dismissible once you're set up, and you can always get back to it at /help/setup or from the ? menu in the header.
How the app is laid out
The left sidebar is your primary navigation:
- Dashboard — your Today stream plus four at-a-glance metric groups: Pipeline, Leads, Listings, Audience
- Contacts — your rolodex
- Emails — drip + subscribers + settings + personal sends
- Conversations — AI concierge conversations with your leads
- Calendar — your schedule, with optional Google Calendar sync
- Leads — inbound leads and early-stage prospects
- Listings — your property inventory
- Open Houses — scheduled showings and their status
- Sales — active transactions
- Documents — reusable templates and contract summaries
- Reports — rolled-up performance metrics
- Billing — your subscription and payment details
- Help — guides and reference, including this page
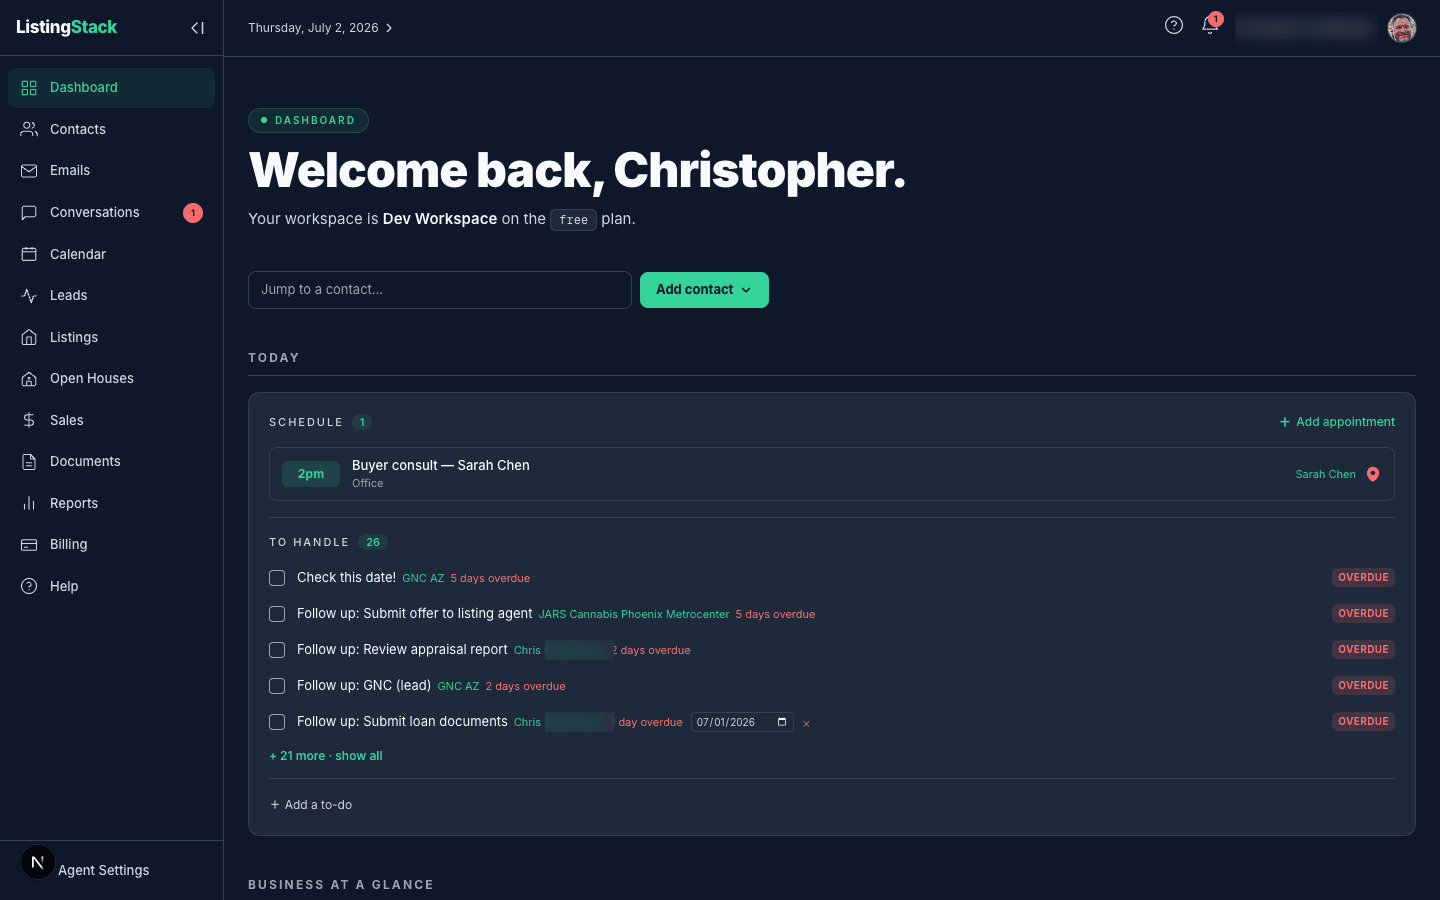
The Dashboardis what you'll open most: a Today stream of appointments, follow-ups, sale tasks and pending sale documents (each with its own deadline), and to-dos, followed by the four metric groups above, each with a headline number and a link into the page behind it.
Below the main list, Agent Settings links to Profile — the same page covered above.
The bell icon at the top shows notifications (new lead alerts, for example). Click one to jump to the underlying record, use the × on hover to dismiss individual items, or clear the whole list with Clear all.
Photo priority
Your agent photo shows up in three places: your public site, email headers on drip/opt-in emails, and the signature block on ad-hoc emails. For the two email surfaces, the source is resolved in this order:
- Photo uploaded via Profile
- Clerk profile image (set when you signed up)
- A generic house placeholder
Your public site is different — it shows only the photo you've uploaded via Profile. If you haven't uploaded one, the public site shows no photo at all (no Clerk or placeholder fallback there). Upload a proper headshot via Profile — it's the one source that guarantees a photo shows up everywhere.