Profile & Settings.
Profile, email settings, concierge, calendar, and billing.
Several pages control how ListingStack represents you and works on your behalf: Profile (your identity — photo, name, bio, slug), Email settings(how your emails behave), the AI concierge, calendar connection, lead forwarding, billing, and the app's appearance. This page walks through all of them.
Appearance (light & dark mode)
At the top of the Profile page, the Appearance control sets whether the app uses a light or dark theme:
- System— the default. Follows your device's own light/dark setting, so ListingStack matches everything else on your phone or computer and switches automatically when your device does.
- Light — always the light theme.
- Dark — always the dark theme.
Your choice is saved to your account, so it follows you to any device or browser you sign in from, and it takes effect immediately — no reload needed.
Profile
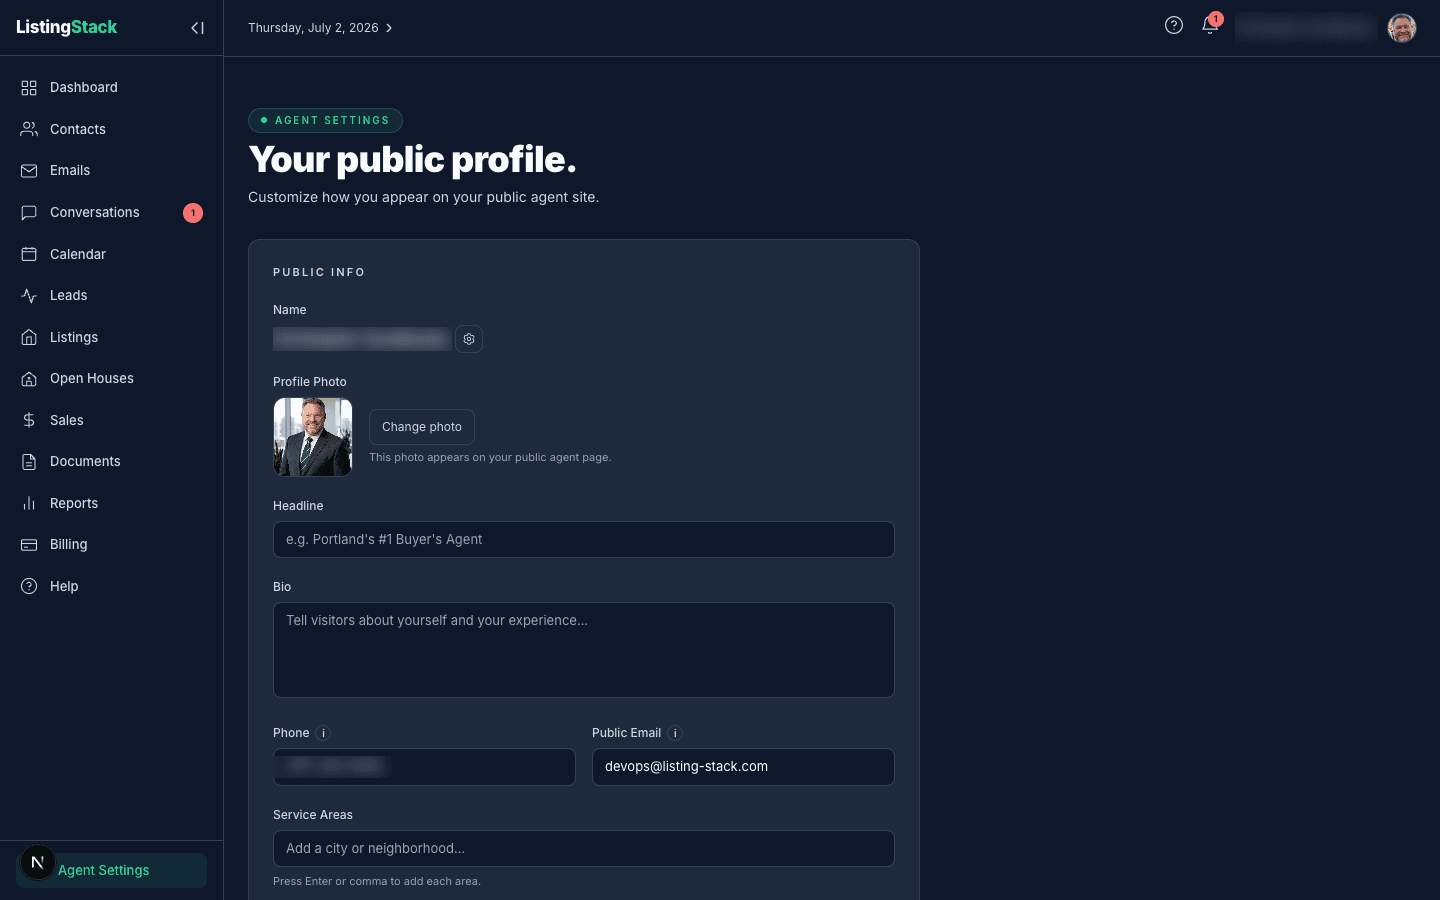
Everything on the Profile page feeds into other parts of the app:
- Photo — shown in email headers, email signatures, and at the top of your public site. See Photo prioritybelow for what happens when it's not set.
- Full name— used as the "From" display name on emails (unless you override it with From name in email settings) and as the heading on your public site.
- Public Email — the address shown on your public site, listing pages, and flyers, and the one merged in as your email in generated documents and template emails. Leave it blank and ListingStack uses your account login email instead.
- Headline and bio — shown on your public site, directly under your name. Headline is one line; bio is longer-form.
- Professional title— the label shown next to your name on your public site (default "Real Estate Agent"). REALTOR® is available as a choice — select it only if you're a National Association of REALTORS® member, since it's their members-only mark.
- Social links — optional Instagram, Facebook, LinkedIn, YouTube, TikTok, X, and Zillow profile URLs, shown as icons on your public site under your contact info. Leave a field blank to hide that icon. Pasting a bare address like
instagram.com/youworks — it's linked ashttps://automatically. - URL slug— the path your public site lives at, generated from your name at signup and unique across ListingStack. It's shown here for reference; there's no in-app editor for it today.
Photo priority
Wherever you need your photo in an email or on your site, ListingStack resolves it in this order:
- Photo uploaded via Profile
- Clerk profile image (auto-captured when you signed up via Google etc.)
- A generic house placeholder (the default)
If you want control over what clients see, upload a dedicated headshot on Profile. The Clerk fallback is mostly useful if you haven't gotten around to uploading one yet — better than the default house image, worse than a proper professional photo.
Email settings
Email settings (there's a ← Back to emails link at the top to get back out) has a Campaigns tab and a Greetingstab. The Campaigns tab is split into three sections, and every field on it saves itself as you change it — toggles and dropdowns save the moment you flip them, the two text fields save when you click away — with a "Settings saved" toast to confirm. A failed save shows a red error toast plus a Retry at the bottom of the form; nothing is lost silently. The Greetings tab is different — it still saves on an explicit Save Settings button.
1. Drip email campaigns
Controls for the recurring emails that go to all your confirmed subscribers:
- Auto-generate — let the AI write one if you haven't composed by the scheduled date
- Auto-enroll all new leads — every new contact with an email gets an opt-in invite (default: only past_client and sphere types)
- Frequency, Send Day, Send Time — the schedule
- From Name — display name on outgoing drip emails
2. Incoming email forwarding
Controls for replies you receive inside ListingStack:
- Forward replies to my email— also sends a copy of every reply ListingStack receives to your own inbox. Replies land in Conversations either way; turn this off once you're working replies inside ListingStack, to stop the duplicates.
3. Personal response emails
Controls for the one-off emails you send from a contact, a lead, a document template, or a document send. Drip campaign emails never use these — they always carry a fixed unsubscribe link and mailing address instead, which isn't configurable here.
- Include signature block — on by default. Turn off to send completely unbranded personal emails.
- Custom signature text — optional free-form text appended below the signature. Good for license number, brokerage, phone.
AI concierge settings
Concierge settings controls how the AI Lead Concierge handles your conversations:
- AI writes replies — when on, the AI automatically responds to new leads and sends nurture nudges; turn off to pause all AI activity (conversations are still recorded).
- AI sends replies automatically — on by default, meaning the AI sends safe replies on its own. Turn it off and every AI-generated reply is saved as a draft for your approval instead, and nothing goes out automatically.
See the AI Lead Concierge guide for the full story on how it replies to leads.
Calendar settings
Calendar Settings — reached via the Settings link next to New appointment on Calendar — covers three things: your Google Calendar connection (Connect Google, or once connected, your synced account and Disconnect; a reconnect prompt appears if Google needs you to re-authorize), the hours you're available, and whether visitors to your public site can book time with you directly. See the Calendar guide for the full walkthrough.
Lead forwarding address
Lead forwardinggives you a dedicated email address to forward lead alerts to from sources like Realtor.com, Facebook Lead Ads, or Zillow — the page includes step-by-step guides for each. Your forwarding address is reserved as soon as your account is created, but forwarded-lead ingestion switches on once inbound email is enabled for your workspace; until then, forwarded messages won't be turned into leads.
Custom Fields
Beyond what's on this page, you can also define reusable custom field values — a license number, office address, disclosure line, anything your brokerage repeats across paperwork — and drop them into any document template as {{custom.field}}. They're managed at Documents → Custom Fields; see the Documents guide for how templates use them.
Billing
Billingshows your current plan and subscription status (Trial, Active, Past due, Canceled, or no subscription), along with your trial-end or renewal date when one applies. If you don't have a subscription yet, you'll see a Subscribe link; otherwise a Manage subscription button opens the billing portal to manage payment and your subscription.
Notifications
The bell icon at the top of the app shows any notifications on your account. Click a notification to jump to the underlying record. On hover, an × lets you dismiss individual notifications; Clear all wipes the list entirely (irreversible).
Mark all readsilences the unread badge without deleting anything — useful when you've seen everything but want to keep the history.
What can't be changed here
Some account-level controls live in Clerk's Manage profile modal (accessible via the Clerk button in the header): password, two-factor auth, connected social accounts. Email address changes also go through Clerk.