Leads.
Capture, import, and forward leads — and convert them into sales.
In ListingStack, a leadis someone who's shown interest but isn't yet under contract. Most leads arrive automatically from your public agent site or an open house, but you can also bring them in by hand, by document, or by forwarding.
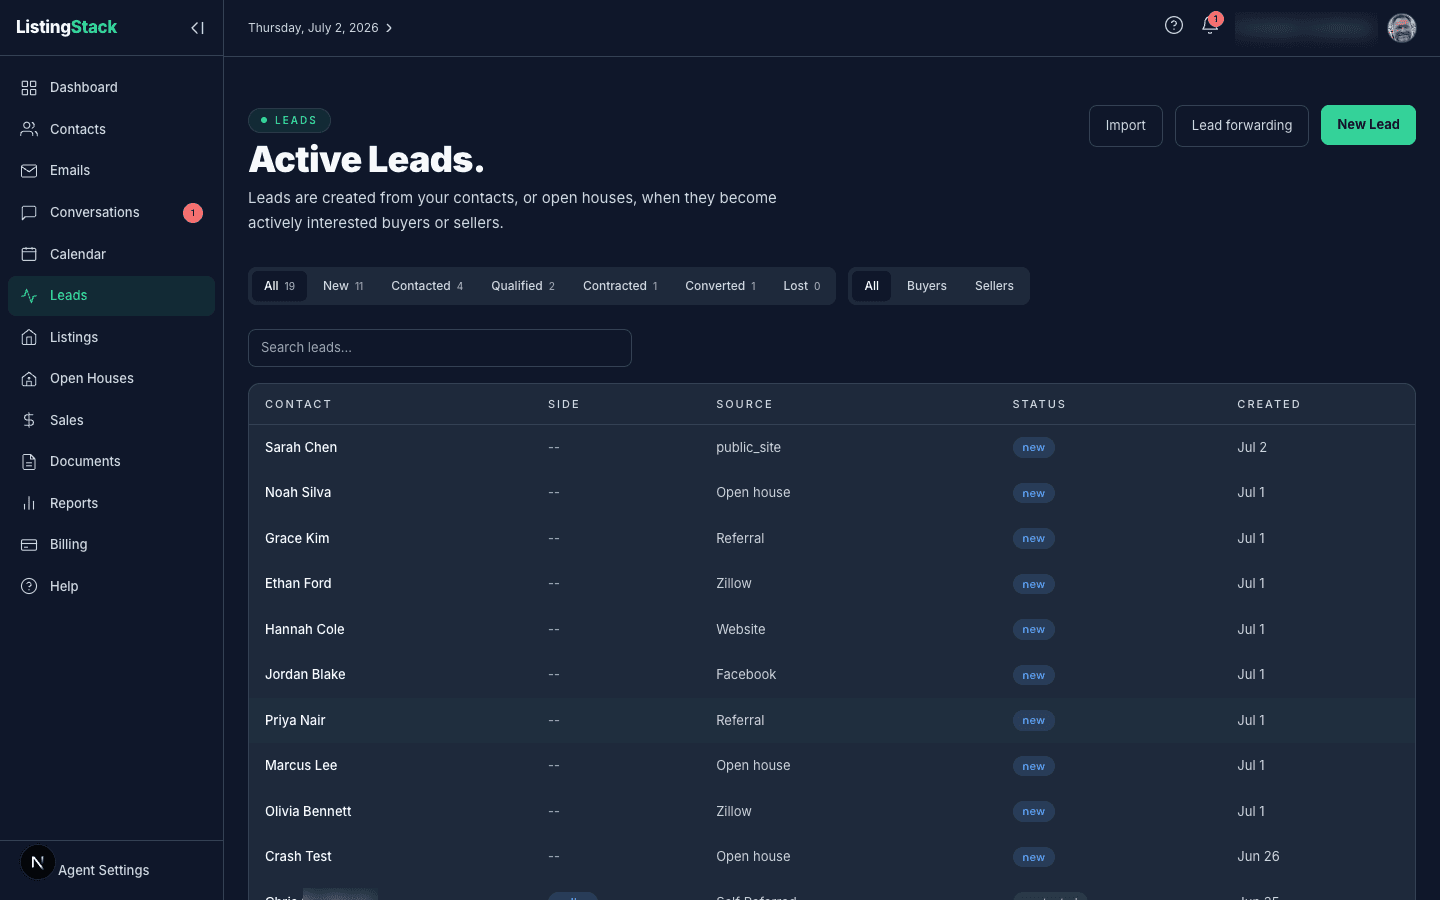
Where leads come from
- Your public site — any contact form submission on
/a/<your-slug>creates a new lead and a matching contact (if the email is new). - Open-house sign-ins— visitors who sign in on your open-house QR sheet become leads sourced "Open house," linked to that listing. On the Leadslist, that lead's Source cell links straight to the listing they signed in at.
- Manual entry— pick a contact, add a source and message, and it's in the pipeline.
- Document import — at Import, upload a PDF or Word document (even a scan or a photo of a sign-in sheet), or a CSV / Excel file. AI extracts each row and reads a per-row source where the document has one, then walks you through the same review step used for contact imports — edit any field, resolve duplicate and low-confidence flags, and confirm before writing.
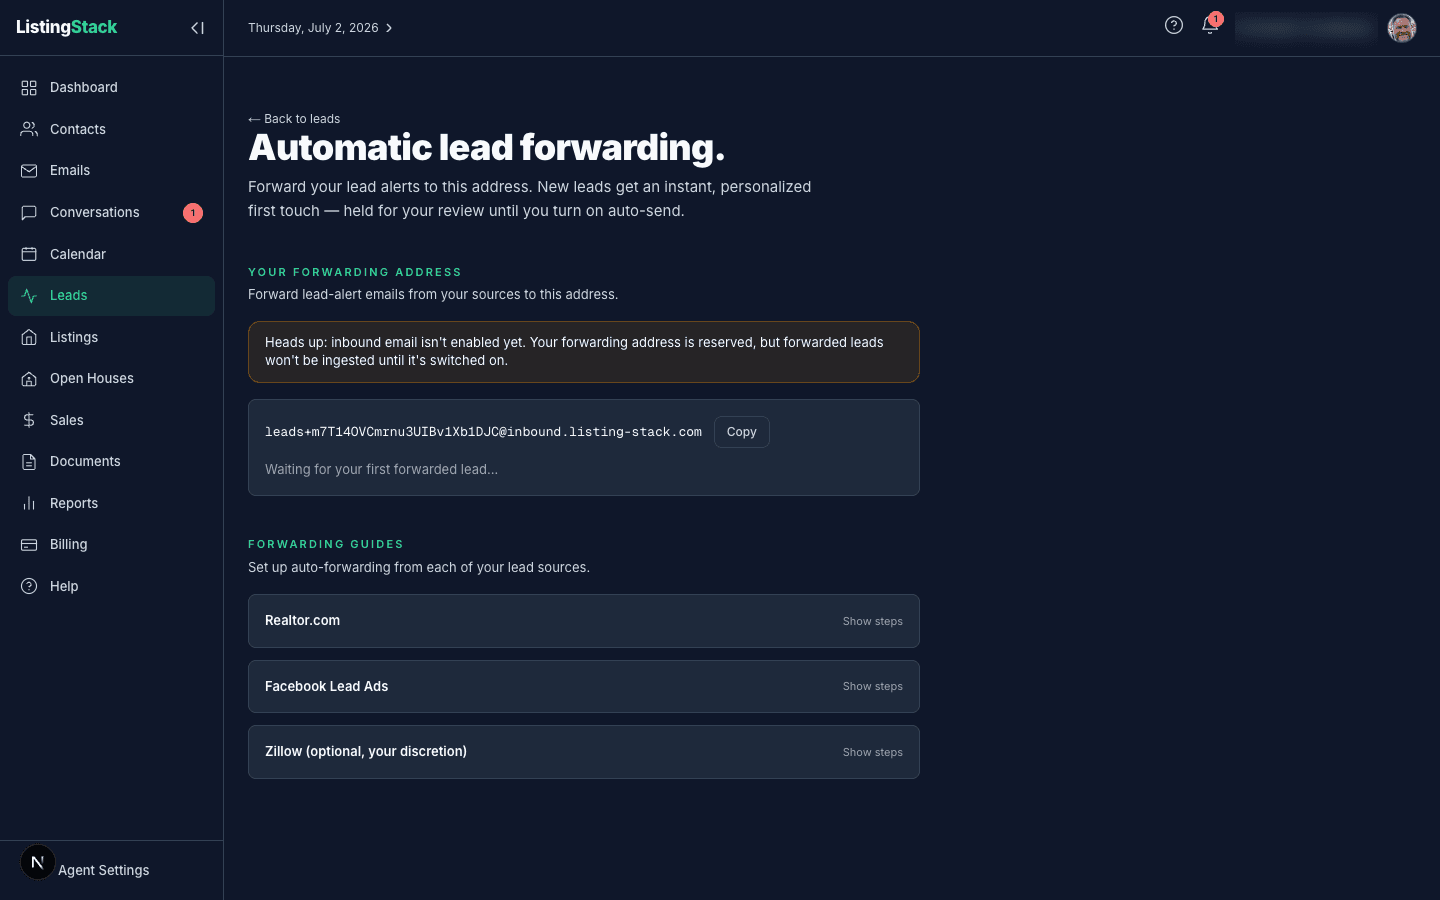
- Lead forwarding — at Lead forwarding, your workspace has its own
leads+…@forwarding address with setup guides for portals like Realtor.com and Facebook Lead Ads. Forward or auto-forward their lead-alert emails to that address and ListingStack parses them into leads. Note: forwarded-lead ingestion has a setup-pending state — your address is reserved as soon as you see it, but forwarded emails aren't actually parsed into leads until inbound email is enabled for your workspace. The forwarding page tells you which state you're in.
The AI Lead Concierge
New leads that come in through your public site or an open-house sign-in can be picked up automatically by the AI Lead Concierge, which replies to the lead by email within moments of them coming in. Leads created by document import are not enrolled — those are batches of names, often without the fresh "I'm interested right now" context the concierge is built to respond to, so they land in your pipeline for you to work by hand. See the AI Lead Concierge guide for how instant replies work and how to keep review control over what it sends.
Lead status
A lead moves through these statuses:
- new — just arrived, not yet contacted
- contacted — you've reached out
- qualified — they're a real buyer/seller and worth working
- contracted— a buyer lead that's signed a representation agreement with you
- converted — escalated into a sale
- lost — not going anywhere
The dashboard's "New this week" stat counts every lead created in the last 7 days, regardless of status — converting or losing a lead afterward doesn't change it.
Working a lead
The lead detail page has everything you need in one view:
- The contact's name, email, and phone with one-click actions
- The original message / source that brought them in
- Status dropdown to advance them
- A Documentscard on every lead — upload the signed agreement or any paperwork, get AI summaries, and generate documents from your templates with the lead's contact pre-filled. See the Documents guide.
- A full activity timeline — every email you send, every status change, every note
- A conversion action for when things get serious — the exact button depends on whether the lead is a buyer or a seller
Leads captured from a bare email address can arrive with no name at all. Those show an Edit Contact button in place of the name link — click it to open the contact and fill the name in.
Replying to a lead
Click the contact's email address on the lead detail page to open the in-app compose modal — the address itself is the entry point now; there's no separate button and no bare mailto: link.
Before you type anything, the modal asks From — which identity the email goes out as:
- Your ListingStack address(the default) — the email is logged as an activity on the lead's timeline, replies come back into ListingStack, you get open-tracking, and — for orgs with the AI Lead Concierge — the concierge can pick up and reply to the conversation on your behalf from there.
- Your own email address — hands off to your own mail app with the subject and body carried over. Replies land only in your personal inbox: no Concierge reply, no ListingStack notification, and nothing gets logged on the contact.
Write the subject and body once and pick whichever identity fits the message — the single Sendbutton (it reads "Open in my email app" once you've picked your own address) does the right thing for whichever one is selected.
Converting to a sale
The conversion path depends on which side the lead is on:
- Buyer leads — click Mark as contracted buyer any time before conversion (available from new, contacted, or qualified) to flip the status to
contracted. Convert to Saleis available once a lead is qualified or contracted — you don't have to go through contracted first. Click it, pick the listing (if one applies), set a projected close date, and the sale shows up in Saleswith a full task checklist ready to go. The lead's status flips toconverted. - Seller leads — click Convert to Listing to turn the lead straight into a draft listing you finish filling out.